Showing posts with label DIY. Show all posts

Tuesday, September 15, 2020

Lets Make a hat!


 So I am all for the weird holidays!  Drink your water day, make your bed day, wear mascara day (not sure if any of these are actually real holidays)  

Well today is no different. It's September 15th which means It's Make a hat day!!  This can be a fun hat for kids, a serious hat, a paper hat or even a service project hat.


A few months ago during the lockdown I was looking for something to do to combat boredom and to also be of service.  I found a local organization that provides crochet or knit hats and blankets to preemies, so I followed their directions and ended up crocheting 80 little preemie hats!!  It was such a great experience for me to be able to use my skills and also help the little babies who need the extra layers. I ended up donating these to Preemies of the Carolinas, (it was a project I had found through justserve.org.)


SO are we ready to make a hat??  I have rounded up a few cool hat making tutorials for your hat making pleasure!


we will start of easy with the ubiquitous newspaper hat!!  I remember back in the day when we would do a play at school about George Washington or Paul Revere etc, we would make the hats out of newpaper, then pain and decorate.  Easy peasy.  


Easy newspaper hat from instructables.com


Got a lot of cardstock and fun things on hand to decorate with? These patterns are perfect for kids who want to create. A variety of templates to cut out , color and bling out.

Paper cutout hats from firstpalette.com


Okay seriously, HOW CUTE ARE THESE?? If you are like me then you have an entire rubbermade giant tote filled with fabric and fabric squares and fat quarters just waiting for a project to be used on!  

Easy Fabric Covered Party Hats by Brendid.com


These ADORABLE  mini halloween top hats are PERFECT!!  These patterns  come as a digital download for members of happythought . 


Halloween top hats from happythought.co.uk


Ok my ovaries are screaming at me just looking at these sweet little hats (SQUEEEEEEEEE!!!)  Soft knit fabric scraps and a little yarn for an adorable pom pom and you have the perfect gift for a baby shower!

Adorable baby hats by madeeveryday.com


Feeling adventurous with yarn and hook?  

10 crochet beanie hat patterns from theSprucecrafts.com


Most people think that if you can crochet then you can knit. I have found this to be a patently false rumor!!  I am not going to lie and say that I can knit...because I cant.  I am a very basic beginner, and my hands are clumsy and I am all thumbs...BUT I can loom knit!  This was the greatest invention. If you can wrap yarn around pegs, you can knit a hat!

Loom knit hat intructions  by dreamalittlebigger.com


 When you think of crazy hats, what comes to mind. For me it is the Kentucky Derby.  Need a hat for a derby party? Check out an easy hat making tutorial.  Kentucky Derby Hat by Jennifermartinovici.typepadcom


Or if you are looking for more KY derby hat inspirations, head over to hative.com for 30 of the funnest derby hats around!


So what will YOU make today??


Monday, April 6, 2015

1970's Brick Veneer Backsplash...ADIOS!!

I HATE this stuff.  Pretty sure it was original to the house. This 1972 Brick veneer that they put up with a black concrete mastic type gunk....UGH. This crap is IMPOSSIBLE to get off the walls...no seriously..  You can pry it off and chisel it out, but you are looking at replacing all the drywall etc from the holes and gouges it will leave.

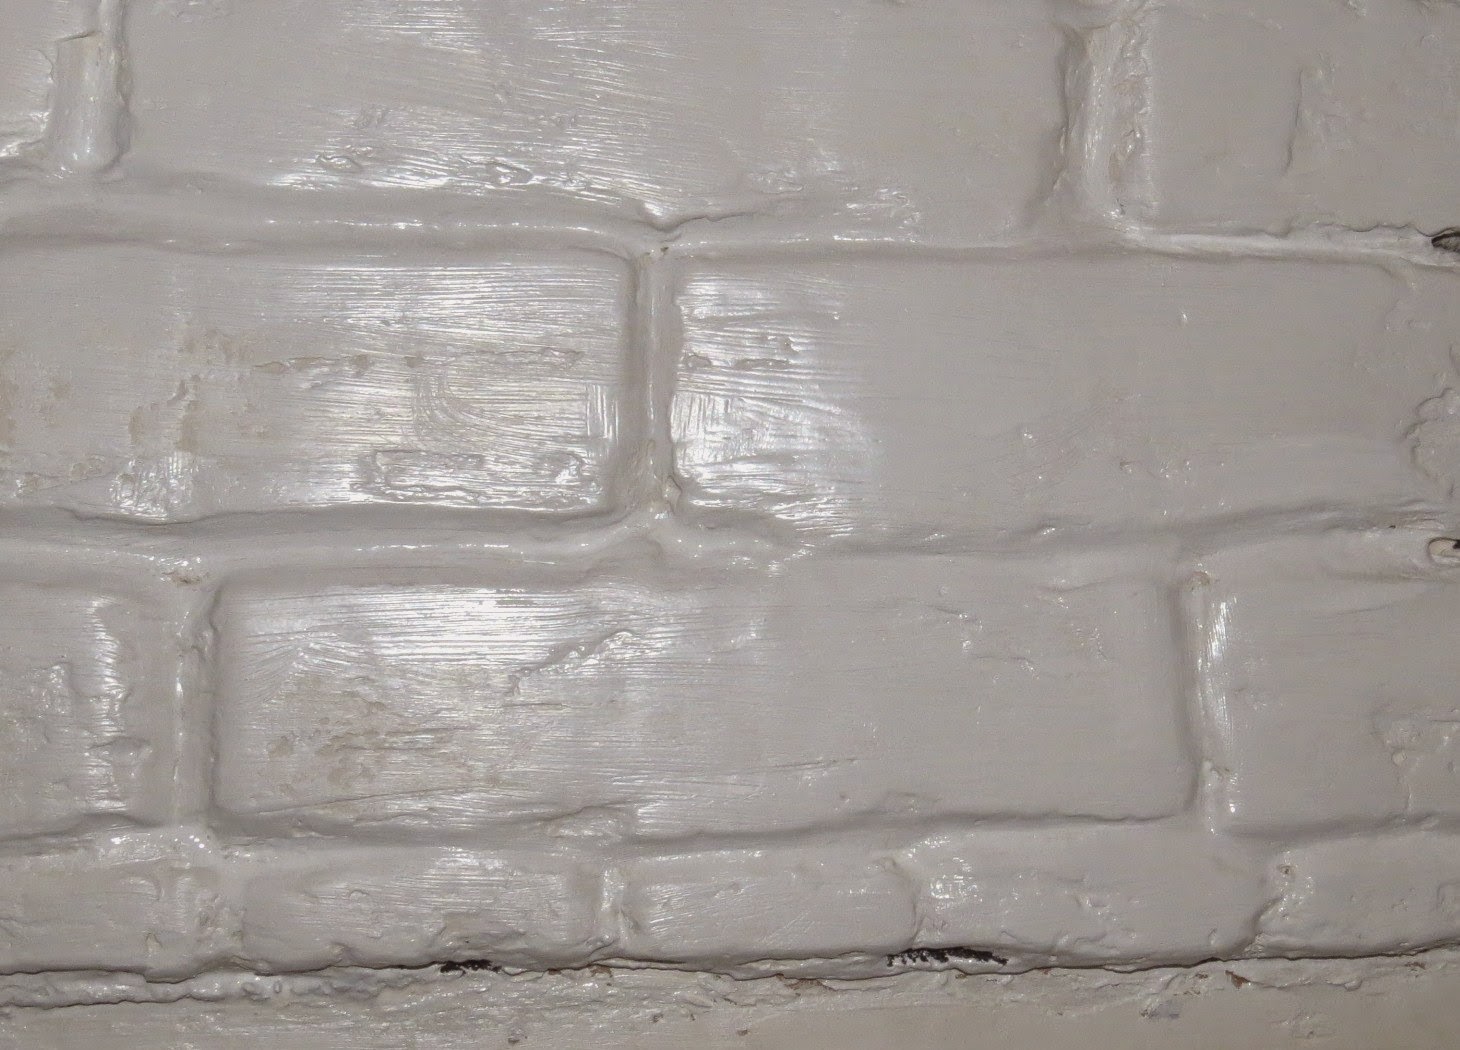
So instead of doing all of that, I decided that I actually like the texture of the "brick", just hate the uneven and jaggedy look and the maroon and orang-y color. After looking online (thanks again pinterest), we found an idea that would save us a lot of work and money, but keep us from having that ugly red brick veneer. Im pretty happy how it turned out. Although this was just going to be a temporary solution (eventually I am going to completely redo the backsplash), I really like how it looks now and am considering keeping it.

We went to Home Depot and purchased a large bucket of compound. It is used for mortaring and brick and patching. It is a do-it-all joint compound.  We covered the entire veneer with it and made the bricks a little more even looking.

We did some nice thick layers and it really evened some things out. Just  by adding the plaster, it totally changed the look of the kitchen.


Look at how much brighter. Just plaster.


We let it dry overnight, then sanded to get any swirls or rough edges off.
I then used Primer to coat twice.
this stuff is the bomb!


After letting the primer dry, I then painted with semi gloss paint - this stuff is the best. Mold and mildew resistant, which is great for the kitchen area.


Just by making this one little change, it has brightened up the kitchen immensely. So although I still have the brick veneer on the walls, it is a little more bearable and looks a LOT better. The 4" gap between counter and brick veneer will eventually be filled in with a backsplash, so I am not leaving that empty. We are waiting for our new countertops to do the backsplash properly.

Oh and we also got a new sink and faucet.


Now onto painting, new countertops, backsplash, new hardware and lighting. Getting closer!!


Monday, April 21, 2014

Home remodel Project- Wood block prep area

So when our tower of terror came down, we ended up keeping the bottom half of that oven tower for the storage. Luckily the oven had a wood slab under it, so we could use that as a base for our project.
Cut out down to the slab above those drawers, so the wood slab was below our current countertops.
Endcap is holding the mixer and red basket.

Well I knew I wanted something on the end there. Originally I was thinking a huge butcher block prep area that we could use as a cutting board etc.  But in doing some research, we decided that was not the way we wanted to go.  We looked at the hardwood needed to cover that area and the amount of skill and time it would take to make something like that was beyond our limited capabilities.  So we decided to turn it into a wooden countertop type surface. To be used as a prep area, just not used as a direct cutting board surface.
Hubby found some hardwood maple plywood at Home Depot for 40$. It was a huge 4x8, THICK and heavy slab, waaaayyy bigger than what we actually needed, but realized quickly we could use the leftovers for other projects. 
So we had Home Depot do their "first two cuts free", into smaller, more manageable slabs that we could fit into the back of our Kia. (Yes, I go to Home Depot and buy ridiculously large items in a Kia).
After rifling through the entire pile of slabs to choose from, we came home with the prettiest patterned slab.(IMHO)
THE slab 

Cut down to the correct size.

Cut down to correct size.

So step one was complete. We ended up going back to Home Depot and Lowes and found some 2"  pine chair moulding to go around three of the outer edges and a thin piece of basic floor moulding to go on the counter side. The counter side we knew we wanted to cover a little bit of the actual countertop with some sort of lip or edging, because when we took the tower out and cut down, we realized the people who built this house had put in the countertops a little crooked and with gaps. So they used lots of basic moulding as decorative endging to get it to look even etc. There at one time had been a piece of backsplash on the tower to also camouflage these imperfections.  So we used this lip to cover the small crooked gap and now you would never know there was an issue.

Using a miter saw we cut those pieces to fit together. Using Tite Bond and a brad nailer, we put these edges on and clamped them while the adhesive dried. 
Once dried we used some wood putty to fill in any small corner gaps and the brad nail holes.  Did a light sand and used a wood stain to color. Following up with 4 coats of Poly coat and a 3 day waiting period, we were in business.
The great part is the chair railing hangs down just a little bit, so it fits snug and secure on the endcap and won't slide off. We reinforced it using sticky back velcro on the underside, so if we ever want to pull it up and redo, we can easily and don't have to mess with nails or glue or anything like that. This countertop is so secure, it is like we used Gorilla glue!

You can see the two types of moulding we used to create the edging.


You can see the funky grain in the edge moulding, gives it a cool zebra wood type look.

This color is exactly the color of my kitchen table, so it matched perfectly

taaa-daaaa.


How our next project...make a similar slab(with the leftovers) to cover the small cabinet next to the stove.
current cabinet top, we tried making from pine slabs, just to see how difficult it would be.  It was OK for an initial attempt, but now that we know what this plywood can do, we will be switching it out.

STILL TO DO:
Prying off the old brick veneer backsplash
Painting
Backsplash
Changing out Hardware
New hanging light fixtures
new ceiling (ugh the dreaded popcorn needs to come down!)

I feel like I am getting somewhere, but at the same time i feel it will be forever until it is all done.

Day trip from Boise- Hells Canyon and Dam , and Owyhee Reservoir

"Hells Canyon, North America's deepest rover gorge, encompasses a vastly remote region with dramatic changes in elevation, terrain,...