Showing posts with label home remodel. Show all posts

Monday, April 21, 2014

Home remodel Project- Wood block prep area

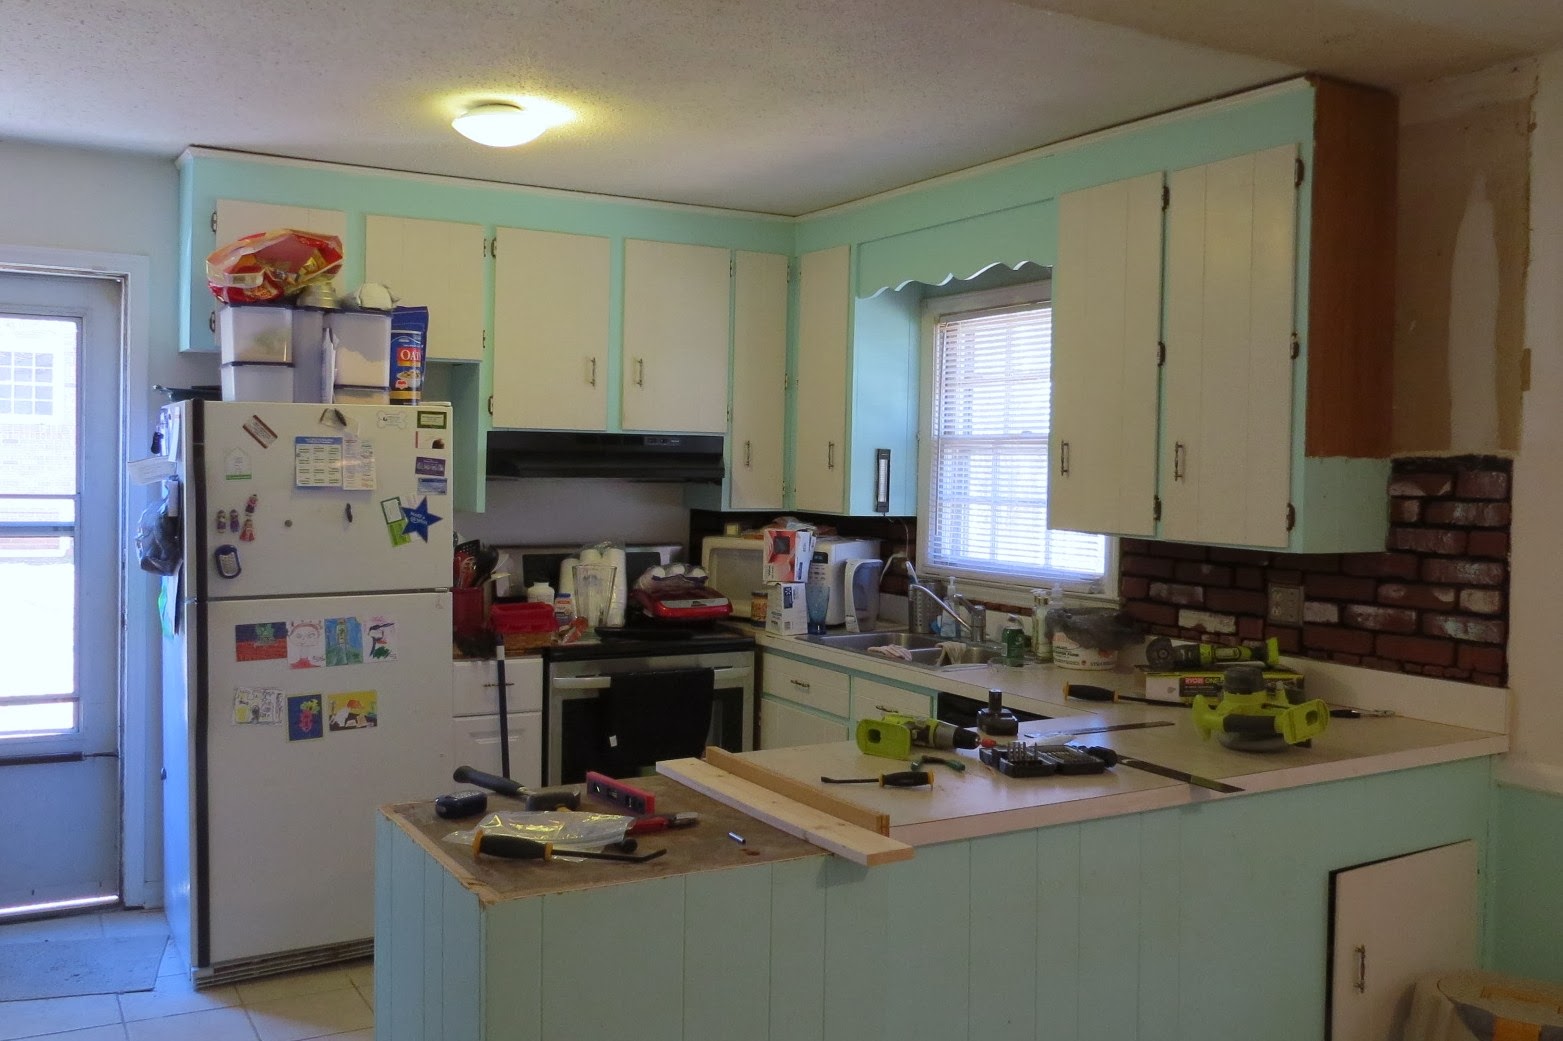
So when our tower of terror came down, we ended up keeping the bottom half of that oven tower for the storage. Luckily the oven had a wood slab under it, so we could use that as a base for our project.
Cut out down to the slab above those drawers, so the wood slab was below our current countertops.
Endcap is holding the mixer and red basket.

Well I knew I wanted something on the end there. Originally I was thinking a huge butcher block prep area that we could use as a cutting board etc.  But in doing some research, we decided that was not the way we wanted to go.  We looked at the hardwood needed to cover that area and the amount of skill and time it would take to make something like that was beyond our limited capabilities.  So we decided to turn it into a wooden countertop type surface. To be used as a prep area, just not used as a direct cutting board surface.
Hubby found some hardwood maple plywood at Home Depot for 40$. It was a huge 4x8, THICK and heavy slab, waaaayyy bigger than what we actually needed, but realized quickly we could use the leftovers for other projects. 
So we had Home Depot do their "first two cuts free", into smaller, more manageable slabs that we could fit into the back of our Kia. (Yes, I go to Home Depot and buy ridiculously large items in a Kia).
After rifling through the entire pile of slabs to choose from, we came home with the prettiest patterned slab.(IMHO)
THE slab 

Cut down to the correct size.

Cut down to correct size.

So step one was complete. We ended up going back to Home Depot and Lowes and found some 2"  pine chair moulding to go around three of the outer edges and a thin piece of basic floor moulding to go on the counter side. The counter side we knew we wanted to cover a little bit of the actual countertop with some sort of lip or edging, because when we took the tower out and cut down, we realized the people who built this house had put in the countertops a little crooked and with gaps. So they used lots of basic moulding as decorative endging to get it to look even etc. There at one time had been a piece of backsplash on the tower to also camouflage these imperfections.  So we used this lip to cover the small crooked gap and now you would never know there was an issue.

Using a miter saw we cut those pieces to fit together. Using Tite Bond and a brad nailer, we put these edges on and clamped them while the adhesive dried. 
Once dried we used some wood putty to fill in any small corner gaps and the brad nail holes.  Did a light sand and used a wood stain to color. Following up with 4 coats of Poly coat and a 3 day waiting period, we were in business.
The great part is the chair railing hangs down just a little bit, so it fits snug and secure on the endcap and won't slide off. We reinforced it using sticky back velcro on the underside, so if we ever want to pull it up and redo, we can easily and don't have to mess with nails or glue or anything like that. This countertop is so secure, it is like we used Gorilla glue!

You can see the two types of moulding we used to create the edging.


You can see the funky grain in the edge moulding, gives it a cool zebra wood type look.

This color is exactly the color of my kitchen table, so it matched perfectly

taaa-daaaa.


How our next project...make a similar slab(with the leftovers) to cover the small cabinet next to the stove.
current cabinet top, we tried making from pine slabs, just to see how difficult it would be.  It was OK for an initial attempt, but now that we know what this plywood can do, we will be switching it out.

STILL TO DO:
Prying off the old brick veneer backsplash
Painting
Backsplash
Changing out Hardware
New hanging light fixtures
new ceiling (ugh the dreaded popcorn needs to come down!)

I feel like I am getting somewhere, but at the same time i feel it will be forever until it is all done.

Monday, March 10, 2014

Demolition of the tower of terror...

Out 1970s kitchen has had it coming for a long time now.  I have waited for this day for 10 LONG YEARS!!! And today it finally happened.  I tore down that bleeping tower of terror.
The oven tower and upper cabinets had blocked the view into the eating area, and basically cut the kitchen in half.  It made the kitchen look closed off and crowded and cramped.  I know this kitchen has great potential,  and the first step to unlocking its greatness was to finally start demolishing the eyesore.

BEFORE:


So hubbs and I got out the prybars, we got out the oscillating tool, we got out the muscle and elbow grease and went to town...


took out the wall oven and needed to cut the tower in half, flush with the countertops...so only demolishing half the tower.


AND after several long hours, we finally got everything out.  Phase one COMPLETE!!


 Still have tons of work to do, but at least those cabinets and that oven tower and GONE!


Next on the agenda:

getting rid of that faux brick veneer backsplash (gag, hate it). 
new countertops.
turning that end portion of the counter into a butcher block
new backsplash
crown moulding around the upper portion of the cabinets
painting

now i can live with this for a little bit as we plan for phase two.

so happy right now.

Tuesday, February 11, 2014

Just a few little tweaks...home edition

This new year we went through the house and got rid of clutter. We threw out junk. And Junk. and did I mention junk?  We have decided to simplify.  We have decided that this is the year we take this house and really start to make it what we want it to be.  This is the year of the remodel.  (Well these are the YEARS of the remodel.)  i know it wont get done in one year, more like 3.  We have a HUGE list.  I mean HUGE.
When we bought this house 10 years ago we were excited for the potential. The price was right. The neighborhood was right. the foundation and bare bones of the house was right. Everything to make this house great was there. We just needed to do a little at a time to make it what we REALLY wanted it to be. But then life happened. Peter had a transplant and other things were a little more important in our life than remodeling our home.
Well things have finally gotten to a point where we can get down to business.
 
The main thing this year is the kitchen. But that is a completely different post. I cant even get into it.  I just cant.  Its too much.

So to keep from getting frustrated , I decided to do just a few little things on the living room.  That room is a little later in "THE LIST"  as there is less to be done, so just a few cosmetic changes here and there. Oh You know,like:  New front door, New front closet doors, new furniture, new pictures and knick knacks, New blinds for the windows, New floor vent covers, paint, scraping the popcorn off the ceiling and painting it smooth.
But in order to feel like I am getting SOMETHING done, I went out and bought a new storage table for our front window in the living room. I redid our curtains and curtain rod for said window. I got a new lamp. WHAT A DIFFERENCE! I also found 2 beautiful prints from IKEA in the clearance section for a dollar each. All I need are some frames and can get those up. But while the kitchen is a disaster zone this next year at least I will have SOMETHING pretty to look at.  Sure it still needs paint, and new furniture and closet doors blah blah blah...but it progress that I can cross off the list!!


BEFORE. Ugly curtain rod. Ugly plain curtains. (but that was my new table) See how plain and bland and blah it was??
Ignore that couch. It is old old old. It was my grandparents...


after. New curtain rod New curtain panels.


Up close new rod and curtain detail.. It is a pale blue with creamy white embroidery.


Love it.

Day trip from Boise- Hells Canyon and Dam , and Owyhee Reservoir

"Hells Canyon, North America's deepest rover gorge, encompasses a vastly remote region with dramatic changes in elevation, terrain,...